

Seller's guide
How to get the highest value when selling your Toronto home
Top dollar is not luck. It comes from the right price strategy, smart prep that buyers notice, marketing that reaches the right people and calm negotiation at the end. Here is the full playbook, with a week-by-week countdown to listing day.
By Spiro Vrysellas, Broker, Vrysellas Team, Elevate Realty Inc., Brokerage.
Your selling playbook at a glance
Tap any part to jump to it. Every step builds on the one before, so the earlier you start, the more options you have.
- 1Price it right
- 2Prep that pays off
- 3Professional staging
- 4Photos, video, floor plans
- 5Marketing
- 6Showings and feedback
- 7Negotiation
- 8Timing
- 9What you walk away with
- 10Your countdown
What top dollar really takes
- Clutter and scuffs in every photo
- A price picked from a neighbour's sale
- Phone photos and a short description
- Buyers find the problems for you
- Negotiating from a weaker position
- A bright, clean, staged home
- A price strategy built on real comparables
- Professional photos, video and floor plans
- Known issues fixed or disclosed up front
- Buyers competing on your terms
Step onePrice it right from day one
Price is the single biggest lever you control. Buyers and their agents compare every home to recent sales nearby. If your price makes sense, they book showings. If it does not, they scroll past, and your home starts to look "stale".
A price that matches or sits slightly under what comparable homes have sold for. It brings in more buyers, more showings and, often, more competition.
Fewer showings, then price drops. Buyers start asking "what is wrong with it?" and the home can end up selling for less than if it was priced well from the start.
Two common strategies
There is no single right answer. The best choice depends on your home, your street and current market conditions, including the sales-to-new-listings ratio in your area, which shows how much competition buyers face.
List at an attractive price and review all offers on a set date. Good for homes likely to draw several buyers. The risk: if fewer buyers show up, offers may come in lower. You never have to accept one, and you can relist.
Price close to expected value and review offers any time. You get more control and one-on-one negotiation, but buyers are more likely to ask for conditions, and there is less chance of competition.
Pro tip: the first days on the market are usually when buyer interest is highest. Getting the price right at launch matters more than any price change later.
Step twoPrep that pays off
Buyers decide how they feel about a home in the first few seconds of a photo or a showing. The good news: the things that change that feeling most are usually the cheapest.
Clear counters, thin out closets, pack away family photos. Buyers need to picture their life here, not yours. Less stuff also makes rooms look bigger.
Dripping taps, sticky doors, loose handrails, burnt-out bulbs, cracked caulking. Each one is small, but together they tell buyers "this home was not looked after".
Fresh, light, neutral walls make a home feel clean and bright, and they photograph beautifully. Focus on the main rooms and any bold colours.
The front is the first photo and the first impression. Tidy the garden, paint or clean the porch and door, add fresh plants and make sure the house numbers are easy to read.
The pre-listing inspection
Some sellers hire an inspector before listing and share the report with buyers. It helps you find and fix problems before a buyer's inspector does, and it gives buyers the confidence to offer without an inspection condition. If the report finds something, you can fix it or factor it into your price. Ask your agent and lawyer how to handle anything the report reveals.
Watch out: a big renovation right before selling rarely pays back what it costs, and the buyer may not like your choices. Spend on what everyone notices, not on your personal taste.
Step threeProfessional staging
Staging is setting up your home with furniture, art and accessories so every room has a clear purpose and looks its best in photos and in person. A good stager knows how to make a narrow Toronto semi feel open and a basement feel like real living space.
The stager brings in furniture and decor. Empty rooms are hard for buyers to read and often look smaller than they are.
The stager works with your furniture, edits it down and adds a few key pieces. Often a lighter, lower-cost option.
You choose and pay your stager, and we guide the whole thing. Spiro and the team walk through your home with you, advise on what to stage and what to leave, and connect you with trusted stagers who know Toronto homes, so every dollar goes where buyers will notice it.
Step fourPhotography, video and floor plans
Almost every buyer meets your home online first. Your photos are your first showing, and they decide whether a buyer books a real one.
Bright, wide, straight lines, shot at the right time of day. We plan the shot list and timing with you so your home looks its best online.
A video walkthrough tells the story of the home: the flow, the light, the street. It also travels well on social media.
Buyers love them. A floor plan with professional measurements answers "will our couch fit?" before they even visit.
Brochures and a property website that explain what makes your home special: the renovations, the neighbourhood and the potential.
Step fiveMarketing that reaches the right buyers

Great prep only matters if the right buyers see it. Your listing gets a detailed written marketing plan and a full team behind it. We consult with you on staging, photography, video and social media and make sure it all comes together for launch day.
- MLS exposure, so every agent in the city and buyers on REALTOR.ca can find your home
- Social media campaigns, including short video tours
- Outreach to agents who have buyers looking in your area
- Open houses and private showings, scheduled to suit you
- Visual pricing tools, charts and graphs that help buyers see the value
Step sixShowings and feedback
During showings, the home needs to look like the photos every time. That means a quick tidy before each visit, lights on, blinds open and you out of the house so buyers feel free to look around and talk.
After showings, your agent collects feedback from the buyers' agents. That feedback is gold. If several people mention the same thing, like an odour, a dark room or the price, you can act on it quickly.
Pro tip: pack a "showing basket" for each morning: a cloth, a spray bottle, pet items and anything that tends to collect on counters. Five minutes and you are out the door.
Step sevenNegotiation: more than the highest number
When offers arrive, the highest price is not always the best offer. A strong offer is one that will actually close, on terms that work for you.
Price, deposit size, conditions (financing, inspection, sale of the buyer's home), closing date and any changes to what is included.
Know your bottom line before offers arrive. Respond with facts, not emotion. Use sign backs to improve terms, not just price.
If you get several offers, your agent may ask some or all buyers to improve. If you get one offer, a good counter offer can move it a long way. Either way, the preparation you did earlier is what gives you leverage now.
Step eightTiming your sale
In Toronto, spring and early fall tend to be the busiest times, with the most buyers and the most new listings. Summer and the December holidays are usually quieter. But quieter is not always worse: with fewer homes to choose from, the buyers who are looking can be very motivated.
Watch how many homes are listing and selling in your area right now, not last season. Your agent can show you.
Your next move matters just as much. Are you buying another home? Talk to a trusted mortgage broker about buying first, selling first or bridge financing.
Step nineWhat you will actually walk away with
Your sale price is not what lands in your bank account. On closing, your lawyer pays off your mortgage and the selling costs, then sends you the rest. Here is what usually comes off the top:
- Your remaining mortgage balance, plus any penalty for paying it off early
- Real estate commission and the HST on it
- Legal fees
- Adjustments for property tax and utilities
- Moving costs and any prep you paid for
Sellers in Ontario do not pay land transfer tax. That is the buyer's cost. If the home was not your principal residence, there may be tax on the gain, so talk to an accountant. To see your own number, try the proceeds of sale calculator.
Your countdownFrom four weeks out to closing day
Here is a simple countdown. Some homes need more time, especially if repairs are bigger, but this is a good rhythm for most.
- 4 wksPlanListing consultation, pricing strategy and a written marketing plan. Book the pre-listing inspection.
- 3 wksDeclutter and repairPack and store what you do not need. Fix the small things on your list and anything the inspection found.
- 2 wksPaint and polishPainting, deep clean, windows and curb appeal. The stager visits and makes a plan.
- 1 wkStage and shootStaging goes in. Photos, video, floor plans and measurements. Brochures and the property website get built.
- LiveListing dayOn the MLS System and social media. Showings and open houses begin.
- OffersOffer reviewOn your offer date, or as offers arrive. Negotiate, accept and collect the deposit.
- FirmConditions removedIf the buyer had conditions, they are satisfied and waived. The SOLD sign goes up.
- CloseClosing dayYour lawyer pays off the mortgage and costs, the buyer gets the keys and your proceeds arrive.
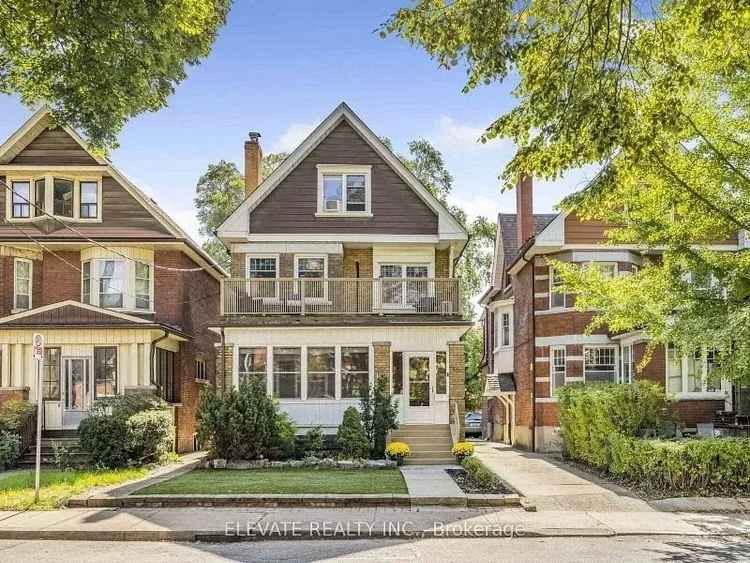
How Grace and Tom prepped their Roncesvalles semi
An example of targeted prep before listing, built with realistic Toronto numbers.
- Four weeks out: Listing consultation. They chose an offer date strategy, priced at $1,349,000 to attract attention, based on nearby sales.
- Three weeks out: The pre-listing inspection found a few small items. They fixed them, packed up a third of their things and moved them into storage.
- Two weeks out: Painted the main and second floors in a soft white, deep cleaned and refreshed the front porch and garden.
- One week out: The home was staged around their own furniture, then photographed, filmed and measured.
- Offer night: After a busy week of showings, they accepted a firm offer at $1,436,000 with the closing date they wanted.
| Their prep | Cost |
|---|---|
| Decluttering and short-term storage | $900 |
| Painting, main and second floors | $7,500 |
| Small repairs | $2,400 |
| Curb appeal: porch, plants, house numbers | $1,300 |
| Deep clean, including windows | $850 |
| Pre-listing inspection | $550 |
| Staging around their own furniture | $3,500 |
| Total prep paid by the sellers | $17,000 |
| List price | $1,349,000 |
| Sale price | $1,436,000 |
| Prep as a share of the sale price | about 1.2% |
Example only. Grace and Tom are not real clients, and these figures are illustrative. No one can know exactly what a home would have sold for without prep. The point is that targeted prep is a small share of the price. Prep costs vary by home, and Spiro and the team advise you on where to spend.
Your pre-listing checklist
- Book a listing consultation and agree on a price strategy
- Order a pre-listing inspection and make a repair list
- Declutter every room, closet and the basement
- Fix the small things: taps, doors, handrails, bulbs, caulking
- Paint the main rooms in light, neutral colours
- Deep clean, including windows and baseboards
- Tidy the front: garden, porch, door and house numbers
- Gather documents: utility bills, renovation permits, warranties and rental contracts
Pro tip: keep a folder of every upgrade you have made, with dates and receipts, such as a new roof, furnace or windows. Buyers pay more for a home they trust, and records build trust.
Frequently asked questions
Should I renovate before selling?
Usually not in a big way. Large renovations rarely pay back what they cost right before a sale. Focus on low cost, high impact prep: decluttering, cleaning, painting, small repairs and curb appeal.
Is an offer date or listing at market value better?
It depends on your home, your street and current market conditions. An offer date can create competition, while listing at market value gives you more control. Your agent should walk you through both with real comparables before you decide.
Is staging worth it?
In most cases, yes. Staging helps buyers understand each room and makes your photos far more appealing. Spiro and the team advise on how much staging your home needs and connect you with trusted stagers.
Do I need a pre-listing inspection?
It is not required, but it often helps. It lets you fix problems before buyers find them and gives buyers confidence to offer without an inspection condition.
How much will I walk away with after selling?
Your sale price minus your mortgage payout, commission and HST, legal fees, adjustments and moving costs. Sellers in Ontario do not pay land transfer tax. A proceeds of sale calculator can give you a quick estimate.
Keep learning
How much will I walk away with? All free real estate calculators Corso Italia real estate guide All Toronto real estate guidesExample figures are for illustration only. Costs, results and market conditions vary, and tax and legal rules change, so confirm details with your lawyer, accountant and mortgage broker. This is not financial or legal advice.